

How To Clean Cat Pee Out Of Hardwood Floors
But, don't despair! I will teach you how to paint your wood floors without any issues and I promise to help you every step of the way. By the end of this article, you will have the confidence (and the knowledge) to get it right the first time. Excited to learn an entire plethora of tips and tricks? So am I, so let's get this show on the road! Most wood floors can be painted (yes, even expensive teak flooring, if you dare). However, you shouldn't never paint directly onto a glossy finish as this usually comes out looking bad. Your best bet is to test the wood that you wish to paint. This can be broken into three easy steps (each outlined later in more details). First, prepare a small area of the wood floor (in the corner or under a couch). Secondly, apply a small amount of paint to the wood and let it dry properly and finally, check the results (within 24 hours) and look for any cracking, peeling, streaking or bubbling. If it looks good, then you can proceed with confidence. If you do experience issues, I invite you to leave a comment at the end of this article and I will help you myself. Traditional oil-based enamel wood paint New latex based enamel wood paint I personally prefer oil based paints for my wood flooring projects, mainly due to its durability. Of course, if the U.S state prohibits the use of it (due to high VOC emissions), then I will use the second option. However, please don't think that you have to copy me. Both have their pros and cons and it's really your decision. When you are applying oil based wood paint, just ensure that you have plenty ventilation, wear a fume mask and let it dry sufficiently. PRO TIP #2 Be careful of purchasing paint that's not meant for floors (especially when choosing latex paint). If it says "acrylic" on the tin, it's not a suitable choice for floors. To eliminate guesswork, choose your color and then just tell your local retailer that you plan to have painted wood floors. They are usually able to assist with specific products that work well. PRO TIP #3 It's important to buy quality paint. The cheaper paint might look attractive, but it often compromises on the raw materials used in its formulation. Quality paint contains many activators and solids (unlike cheaper options) and will last longer. Always look for a good deal but be careful when the price is super low. While the color choice is completely up to you, check out this Pinterest board on wood painted floors for some ideas. It's important that the paint color of your wood floors match your various interior design elements. While it is possible to start over, that won't be necessary if you spend some time doing some research beforehand. This can actually be rather fun, especially if you do it with your significant other or a friend. Sheen is the reflective quality of the paint. Although most floor coatings (varnish, etc.) have a sheen value, I will keep this guide focused on colored paint. There are four levels of sheen for wood paint and each has a different reflective quality defined by the percentages below. Starting from the shiniest, they are glossy (75%), semi-gloss (55%), satin (40%) and matte (20%). House logic has a great article on this so check that out. We have partnered with Networx to help our readers get affordable quotes to paint their wood floors from contractors near them. Simply , fill your details and you will get a few within 48 hours. There is zero obligation and this service is 100% free. 🙂 PRO TIP #4 The shiner you go, the more those little dings and scratches will show (awesome rhyme right?). While useful, don't focus too much on the percentages as they are textbook values. I suggest looking at real world examples (in person) to help you make a final decision instead of browsing through images online. Simply visit your local retailer and look at their stock, no guesswork involved. When people ask me for my honest opinion, I usually recommend either satin or semi-gloss. I personally think that full gloss doesn't fit well in most homes and the matte/flat sheen looks a bit dull (most of the time). On that note, here are their pros and cons: PRO TIP #5 I have left out "full glossy" and "matte" options because only a small percentage use it for their home. I personally feel that the high gloss looks like shiny plastic and the matte or flat sheen looks dull. That is my opinion though and I encourage you to choose what works for you. The amount of paint that you will need will depend on 3 factors: The thickness of the paint: If you are using oil-based paint, you will need a larger quantity than a thinner water-based paint. The thicker the paint, the more is needed but on a positive note, you won't need as many coats of it so it can even out in the end. The area of the floor: If you have large rooms, the simple truth is that you will need more paint to cover them sufficiently. As a general idea, you'll need about a gallon to cover around 350 square feet for your painted wood floors so keep that in mind. The number of coats: If you need to apply two coats, then you will need to double the amount of wood paint. If you want a third coat for some reason, then times the initial amount by three and so on. PRO TIP #6 If you buy a high-quality paint, this can eliminate the need for a potential third coat, thus saving you money in the long run. Ask your local hardware store clerk to point out their "premium" floorboard paint and run the math. If you are unsure, just ask if it will remove the need for a second coat and they should be able to advise you. There is a lot of confusion when it comes to applying a "primer" to wood floors, especially when you are using paint. Let me help you understand this clearly and hopefully you can share this with your friends. Simply put, if your floor still has its previous coating and there is no bare wood exposed, you don't need to use a primer. On the flip side, if wear and tear that has stripped away parts of the previous finish, you need to apply the primer to these areas. This might mean that you need to prime the entire floor but don't do it unnecessarily. PRO TIP #7 There are two main types of primer that you should use on hardwood floors – oil-based primer and latex primer. You should always match the type of primer with the type of paint you are using. Also, try matching the primer color with the finishing color that you will use. Doing this (when possible) can potentially save you the time of applying a second or third coat of paint in the end. As long as you are careful, this can be a great DIY project. However, due to affordable local contractors in the U.S, sometimes it's not worth the time and effort so don't forget that Pro Floor Tips can help you request a free quote if you prefer to go that route. If you are going to try this yourself, you will need the following tools and supplies for your painted wood floors: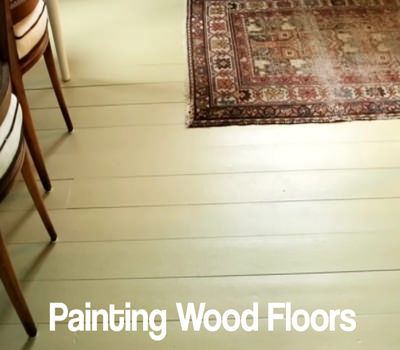 Trying to improve the appearance of your hardwood floors can often feel rather daunting, even downright scary. After all, they often cost a fortune and the thought of painting them can make most people nervous, especially if you mess it up.
What Types of Hardwood Floors Can Be Painted?
Why Would You Even Consider Painted Wood Floors?
What Type of Wood Paint Is Best For Your Floors?
 PRO TIP #1 Try get a paint that contains polyurethane. This chemical adds strength and is great for slightly humid environments. If you can't find one, you can always apply a coat of polyurethane afterwards so don't worry about it.
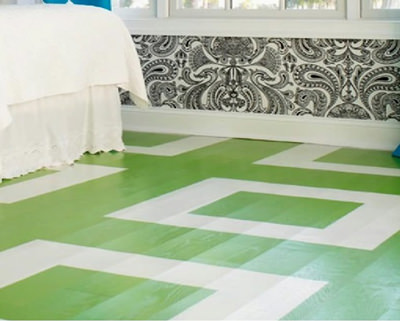
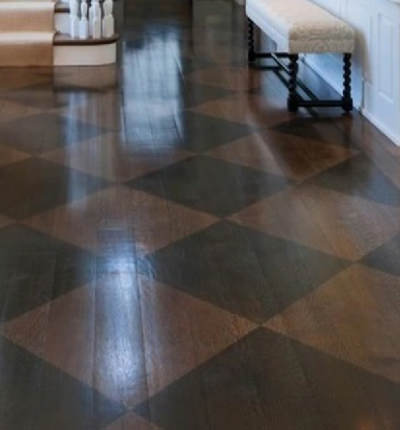
Some Popular Paint Colors and Styles For Wood Floors
What Sheen Best Suits Painted Wood Floors?
Special Offer: Get a Free Wood Floor Painting Quote (United States Only)
How Much Paint Is Needed For Your Wood Floors?
Should You Use a Primer On Your Wooden Floors Before Painting?
How to Paint the Wood Without Screwing up Your Floors
Sandpaper (150 grit) Vacuum machine Broom Couple rags Water (or solvent) Paint brushes Paint rollers Painters tape Sufficient floor paint Correct primer Paint tray Dust pan
Step 1 - Sanding Step 2 - Cleaning Step 3 - Priming Step 4 - Primer scarify Step 5 – Tape it up
Use the 150 grit sandpaper and scar the surface of the previous finish (varnish, etc.) in a circular motion. If you are redoing previously painted wood floors, just make sure you partially remove the previous layer of paint, especially if it's darker. If the surface is uneven, you also want to smooth it out. NB: You don't usually need to completely remove the previous layer.
Sweep up all the dirt and leftovers from the previous task. I usually just use my vacuum to suck it up but a brush and pan work fine as well. Next take a cloth rag with some warm water and proceed to wipe the entire area down, leaving no area untouched. You are welcome to use a detergent mixture, just read the instructions on the bottle beforehand. At this point, you should have no dust in the room.
Provided the floor is completely dry (usually it's a good idea to wait at least 24 hours), apply the paint primer where needed. Remember, you only need to apply it to bare, exposed wood, not to your scarred finish that you used the sandpaper on. This means that you might not even need to apply any primer at all, which will definitely save you money.
Please note that this step is only necessary if you applied primer, otherwise move on to the next part. Take your sandpaper and repeat step 1 on the dry primer. Although its not a necessity, 220 grit sandpaper works better than 150 grit for this task. Remember, you are not trying to remove the primer, you are just lightly sanding it, using the same motion. You also don't need to apply a lot of pressure while doing it.
This is important as it will help you keep paint off the moldings and other parts of the room. While most painters tape will work, I recommend using "frog tape", if it's available locally. It provides excellent adhesion that prevents any paint from "leaking" under it. If you want to create shapes and patterns, you can use the same tape. Just remember that these are typically done after your first layer is down (depending on the design).
Please don't rush this step, it could mean the difference between a successfully painted floor and a botched one. Once the entire wooden surface of your floors has been worked, move onto the next step. Also, make sure that you use the correct primer, whether it be oil or latex based, otherwise you will have less and desirable results. Allow your floor to dry overnight. Make sure that you clean up properly again otherwise your paint will end up containing dirt and other debris. If you used a wet cloth (recommended), leave it to dry overnight. Hopefully, you can see how important the preparation steps are. Even if you were a pro, the correct preparation is critical and I encourage you to complete all the steps thoroughly.
PRO TIP #8 When you are cleaning, priming or painting the wooden planks, start from the back and finish at the exit. If you don't, you will end up trapping yourself in the room which is a noobie mistake. Instead of taping the moldings, you can also remove them completely or simply paint over them (when it makes sense). Lastly, before starting, it's a good idea to block the space under the door to keep the dust out.
PRO TIP #9 When you are painting the corners of the room (next to the molding), position the brush so that your stroke moves away from the wall. This little trick will ensure that paint doesn't have any way to get under the tape like it might if you painted towards it.
In conclusion, painted wood floors usually look absolutely gorgeous and can really bring life back to your old floors. Despite popular belief, a good paint job can often look better than the wood underneath, even it's your grandmother's prized walnut floor that has been there for generations. The key to success depends on sufficient preparation, especially when it comes to cleaning, priming and scarring. If you manage to get all that right, the actual painting process is usually fairly easy.
Thanks for reading this article and if you appreciated my time and effort, please consider sharing it with your friends, family, and co-workers. Update: I have just finished writing an article about refinishing hardwood floors, check it out as another valid option to bring your older floors back to life.
How To Clean Cat Pee Out Of Hardwood Floors
Source: https://www.profloortips.com/hardwood/painting-wood-floors/
Posted by: davisbecterrech.blogspot.com
0 Response to "How To Clean Cat Pee Out Of Hardwood Floors"
Post a Comment