

How To Take Ownership Of A File In Windows 10
Windows ten's file system tin can be used to to assign permissions to specific groups and users to access files and folders on a computer.
When you're signed in to your Windows 10 account, you get full control over the files and folders you create, sometimes you may too need access to other files. It could be files from an one-time account from a user that'southward no longer around, or perchance some system files you need to tweak edit to customize certain aspects of the operating system.
If y'all don't have specific permissions, Windows 10 will deny you lot admission. But if your account has administrative privileges, you lot can accept buying of sure files and folders on your estimator.
In this guide, we'll walk you through the steps to take ownership of files and folders on your Windows ten PC without the demand of a third-party tool.
How to take ownership of files and folders
- Open up File Explorer.
- Browse and find the file or folder you desire to take total access.
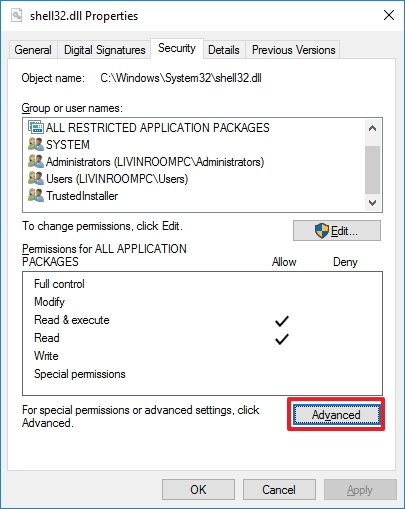
- Right-click it, and select Backdrop.
- Click the Security tab to access the NTFS permissions.
-
Click the Advanced button.
-
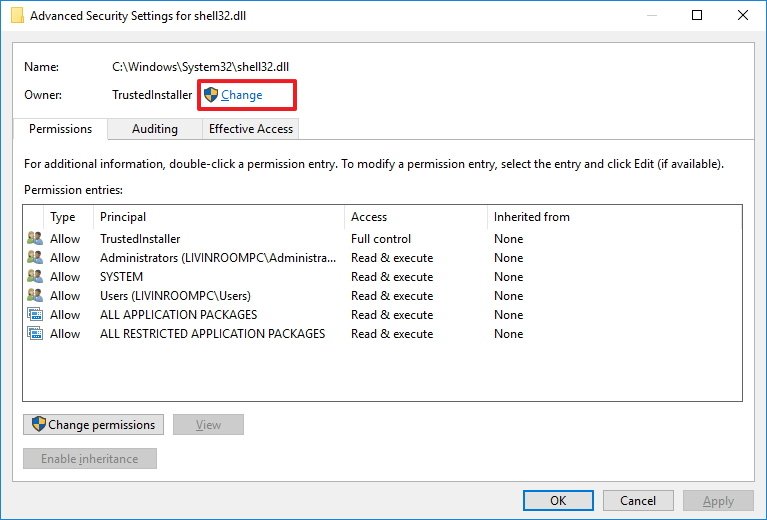
On the "Advanced Security Settings" page, you demand to click the Alter link, in the Possessor's field.
- Click the Avant-garde button.
- On the "Select User or Group" page, click the Observe Now push button.
-
From the search result, select your user account, and click OK.

- On the "Select User or Grouping" page, click OK.
- Click Employ.
-
Click OK.

- Click OK once more.
- Click OK ane more time to complete this task.


Information technology's important to note that if you're taking buying of a folder, you lot can check the Replace ownership on subcontainers and object option in the Avant-garde Security Settings folio to have control of the subfolders inside of the folder.
Now you lot'll need to grant total admission control to your account, to practise this use the following steps:
- Right-click the file or folder and select Properties.
- Click the Security tab to access the NTFS permissions.
- Click the Avant-garde push.
-
Under the Permissions tab, click Add.

- Click Select a primary to add your user account.
- On the "Select User or Group" page, click the Find Now button.
- From the search result, select your user account, and click OK.
-
On the "Select User or Group" page, click OK.
- On "Permission Entry", check the Total control option.
-
Click OK.

- Click OK.
- Click Utilize.
- Click OK.
- Click OK to shut the file or binder backdrop to complete the job.


It'due south important to note that if you're taking ownership of a folder, you can check the Replace all existing inheritable permissions on all descendants with inheritable permissions for this object option in the Advanced Security Settings folio to replace the subfolders permissions with the settings from the parent folder.
More Windows x resources
For more help articles, coverage, and answers on Windows 10, y'all can visit the post-obit resources:
- Windows 10 on Windows Key – All you lot need to know
- Windows 10 help, tips, and tricks
- Windows 10 forums on Windows Central

Information technology could work
Here'south why 'saving' Surface Neo by putting Android on it makes sense
Surface Neo was never officially canceled, but it's besides unofficially never coming. What should Microsoft do with the design? It's likewise modest for Windows 11, and there's no Windows 10X. Would Android exist a good fit? It seems to be working for Surface Duo, which is cypher more than than a smaller version.

How To Take Ownership Of A File In Windows 10,
Source: https://www.windowscentral.com/how-take-ownership-files-and-folders-windows-10
Posted by: davisbecterrech.blogspot.com
0 Response to "How To Take Ownership Of A File In Windows 10"
Post a Comment